How to Install Your Own Well Hand Pump Step by Step Guide
Most well pumps run on electricity. While this has several benefits in terms of efficiency and reliability, it does not compensate for one huge downside - you won’t have water if there is a power outage.
Power outages are unexpected and can last for hours if not days at a stretch. If that happens and your water supply depends entirely on a steady flow of electricity, you’ll be left without water.
Therefore, households install a deep well hand pump to supplement their water supply. Since these well pumps run manually and do not need electricity, they aren't affected by outages.
However, installing the well pump can be intimidating and is an extra cost. This turns off homeowners because they don’t want to make an extra expense as a precautionary measure. We’re here to tell you that you don’t need to pay a company for installation.
The process can seem complicated, but it is super straightforward if you have the right information. By the end of this article, you’ll have all the necessary knowledge.
How To Install Your Own Deep Well Hand Pump
Step 1: Confirm Your Well Piping Setup
Most deep well pump installations are simple enough for homeowners to do them themselves as the manual pump can be installed next to the submersible pump.
However, there is one extenuating circumstance under which we would advise getting in touch with a professional and asking them to do the installation.
If your submersible output pipe goes through the top of the well cap, you can’t do the installation yourself. You will have to hire someone to lift the well cap with the pump and pipes and swap it with the deep well hand pump’s well cap.
Once they have done that, they will have to put the pump into the new casing and seal. You can’t do this yourself. However, after they’re done, you can take over and install the hand pump.
There are a few other things you should confirm before starting the installation yourself.
First, you need to be comfortable with electrical wiring and simple plumbing tasks. These skills will come in handy when you’re putting in a new pump.
Second, make sure you know how to disconnect the power to the submersible pump. If you haven’t lived in the area for long, you might not be familiar with how it works. Or, if you share the property with someone else, they might turn it on after you disconnect it.
Third, check the weight of the well pump you’re installing. You need to be able to lift it easily. If it is too heavy for you, ask a friend or family member to help you. However, if that is not possible, it might be better to leave it to a professional installation company.
Step 2: Get the Tools
Once you have confirmed that you can do the installation yourself, you need to get some tools.
The tools will make sure you are ready and equipped to carry out the installation smoothly. It is very important to have all of them since each is responsible for a specific task and cannot be replaced by another. The following tools are recommended for the Simple Pump Deep Well Hand Pump, other manufacturers might recommend different tools for the job. Many of these installation tools and components are available through our parts catalog.
Here’s a list of everything you’ll need:
- 1 Allen Wrench set (1/4”, 3/16”, 5/32”)
- 2 Channel-lock pliers (they need to be big enough to hold on to a 1.75” diameter pipe)
- 2 Vise grip wrenches
- Teflon tape
- Diluted bleach solution
- Wire cutters or strippers (only need this if you are installing the deep well hand pump next to a submersible well pump)
- Permatex anti-seize Lubricant (a small tube will work)
- Loctite thread locker (medium strength)
Step 3: Inspect Your Well
Remove your well cap and use a flashlight to look for any obstructions. This may include tangled or excess wires.
Wells without a submersible pipe through the cap have a pitless adaptor. This component is responsible for pulling water up. You need to clear enough space that you can drop a pipe to its depth.
Step 4: Replace the Existing Well Cap
If your well already has an electric submersible pump, you will need to replace it with a new well cap. The specific process depends on the type of cap used.
Pitless Well Cap
Pitless well caps are super easy to replace. Disconnect the three wires and touch their bare ends to the well casing one at a time. Then tap them to the piping a few feet below.
After that, take the wiring inside the casing and slide the well cap over the case. Level it and take the wires outside the casing and pass them through the bottom section of the well cap.
Enclose the wiring and make sure it isn’t coming in the hand pump’s way. Tape the power cables and submersible pump’s safety rope to the submersible pump’s pipe. Make sure that neither is spiraling and is flat on its surface.
Once you’re done, reconnect the electric current and run your existing pump to make sure it is working properly.
Machined Well Cap
Machined well caps are used when a submersible pipe comes up through the well cap. In such a scenario, we recommend asking a professional to do the installation. They will deal with the well cap as well. You can find certified installers in your area or request a professional installation quote.
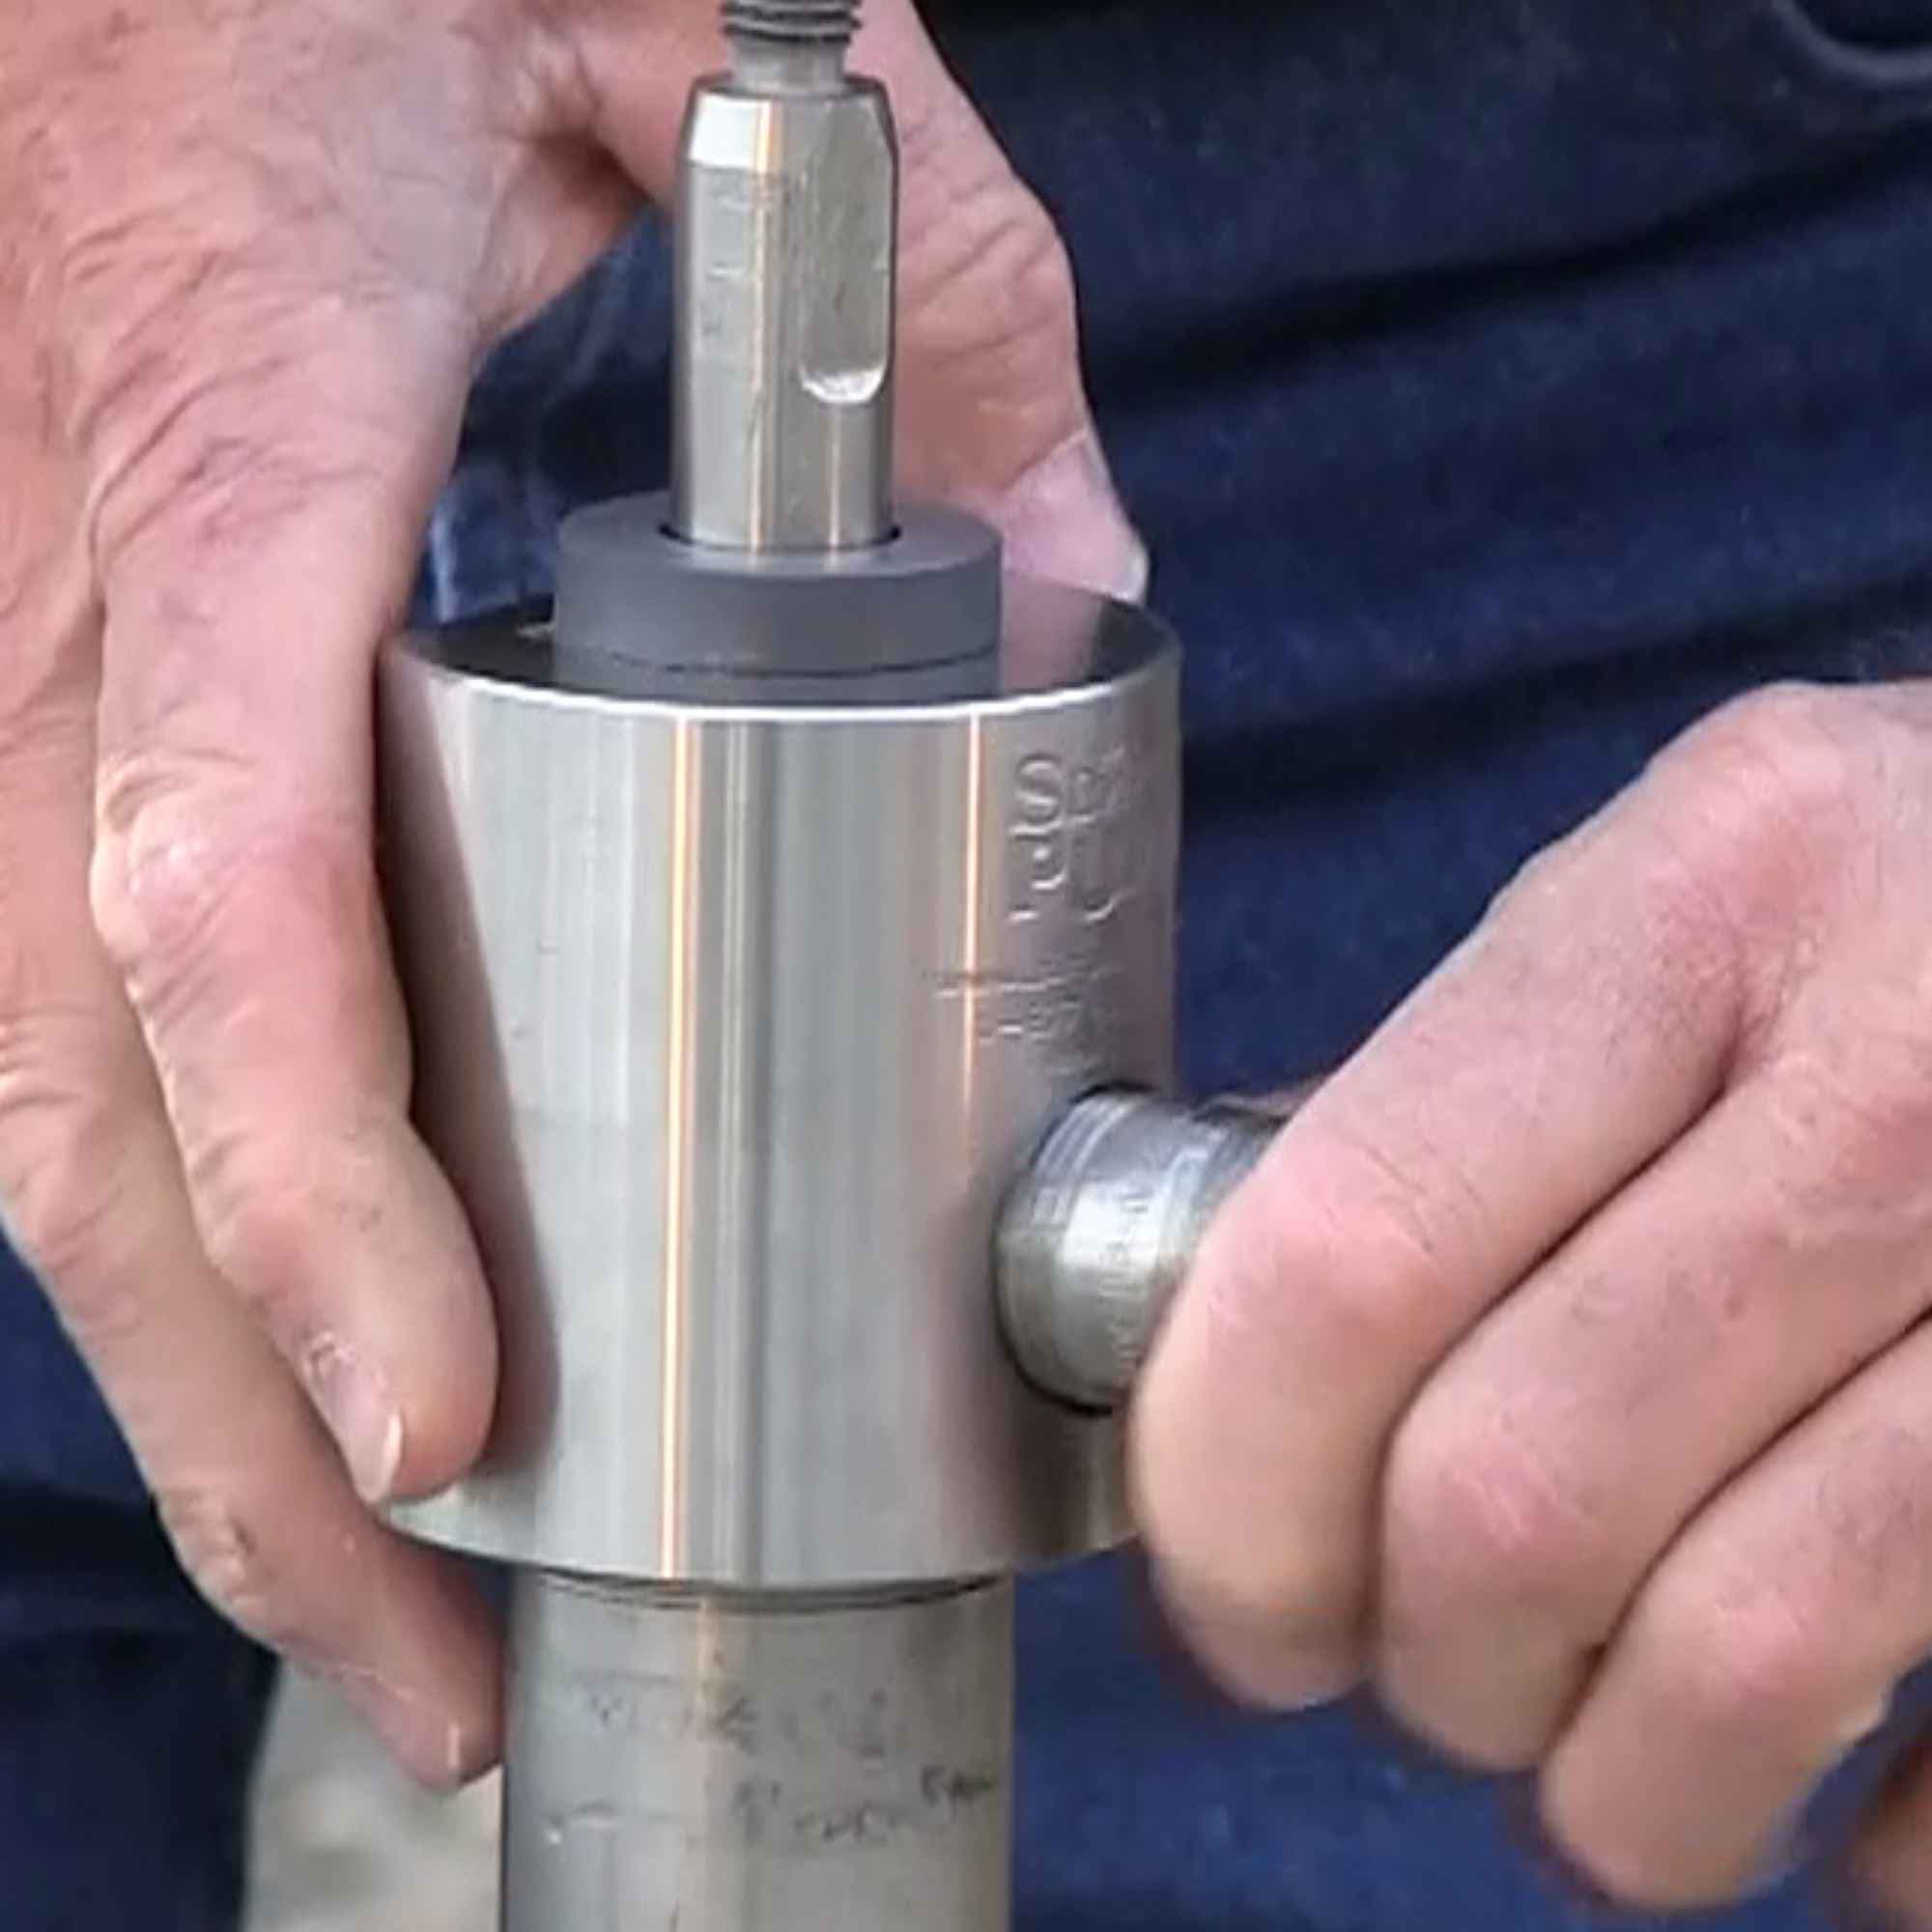
Step 5: Install the Hand Pump Cylinder
Use a dilute bleach solution to clean all the pipes and rods you’ll be using. It’s important to ensure they won’t contaminate your water supply. Then connect the male threads on the piston rod to the female threads on the sucker rod.
You can tighten them further with Loctite.
Apply around 3 wraps of Teflon tape on the male threads and then make a mark at 5/8" from one end of the pipe. Bring the sucker rod attached to the piston rod to the male end of the drop pipe.
Then thread the drop pipe into the pump cylinder and tighten it. Once you’re done, introduce the pump cylinder and place the safety tool on the three-bolt heads on the well cap. Place the pipe’s female end on the safety tool.
Add all the sucker roads and drop pipes while maintaining a 4 to 6 inches distance between the tops of each.
Attach the second sucker rod to the rod you just installed. When connecting them, you should use your channel locks or vice grips. Don’t use too much force because you could end up breaking the rod.
After you’re done, install the second drop pipe. Follow the same method as you did for the first pipe. Then arch it so that you can fit it into the drop pipe’s male end.
Lift the drop pipe up and take the safety tool away. Drop the pipe a few inches and attach the safety tool to the next drop pipe.
Continue this process for all the drop pipes.
Step 6: Keep Going Until You Reach the Water Table
Keep attaching drop pipes until you reach the water table. Ideally, you should know the total depth of your well and the static water level to make sure you position the pump correctly.
You can calculate how far you need to go by lifting the sucker rod above the ground. Move it up and down every time you add a drop pipe. You’ll feel a difference in the effort required to pick it up as soon as you reach the water. Make sure you position the pump with enough margin to account for seasonal differences in your static water level, otherwise you may need to add more drop pipes if the pump cylinder ends up being higher than your water level when you need to use it.
Step 7: Install the Pump Head
Check if you need to adjust the sucker rod. Once that’s dealt with, install the riser tube.
Bring it over the pump rod and lower it. Tighten the relevant pinch bolts and mounting bolts. Then attach the lever arm and handle assembly.
Step 8: Pump Your Water
You’ll need to pump about 7 to 10 times for water to reach the pump head. The water will come out of the pump, and you’ll have access to it.
Over time, you may need to increase the number of pumps before you get water because the water table will go down. However, this won’t be a drastic change unless you’re over pumping.
Congratulations! Your deep well hand pump has been set up!
Real Customer Installation Times: What to Expect
After 25+ years of installations and thousands of customer experiences, here's what actual installation times look like:
First-Time DIY Installers
- 1.5 hours: Maine customer, 140-foot well, zero plumbing experience
- Under 2 hours: Montana customer in snow, 80 feet of drop pipes
- About 4 hours: Idaho customer taking their time, using 8' ladder for safety
Age is No Barrier
One of our most impressive installations: a 60-year-old, 100-pound woman in Georgia completed her installation in less than 3 hours with help from her disabled 59-year-old male helper who "did it while sitting in a chair."
Her key insight: "The handy pipe holder made attaching each piece of the pipe a breeze. If you can screw a lid on a jar, you can do this!"
Professional Validation
Maine well drillers who witnessed one of our installations were "highly impressed... blown away by the superiority of the Simple Pump in comparison [to Bison]... commented on the high quality of the materials."
Result: They're now "recommending Simple Pump to everyone who has asked them about hand pumps."
Installation Success Tips from Real Customers
- Take your time: Customer who took 4 hours said "better safe than sorry"
- Get help: Having someone to hold pipes makes a huge difference
- Winter installations work: Montana customer installed successfully in foot of snow at 45°F
- Use proper tools: The recommended tools list makes all the difference
Frequently Asked Questions About Deep Well Hand Pumps
Q1. Is it okay if I only pump my deep well hand pump occasionally?
If your well has a high concentration of solids or minerals, they will accumulate on different well pump components. So, you should pump it for a few minutes every week to prevent these deposits.
Q2. What is the normal position of the pump handle?
The normal position is vertical. The handle should point to the sky. This position keeps the pump rod safe from contamination.
Q3. Will my well pump freeze in the winter?
The water in your well pump probably won’t freeze since the weather doesn’t go below freezing point in most of our states. However, it is better to make a small weep hole just in case. Check out our article on freeze-proof well pumps.
Q4. Do you have a video showing the installation of a deep well hand pump?
Yes, check out the Simple Pump YouTube channel to see us install our deep well hand pump.
Wrap Up
That’s all you need to know about installing a deep well hand pump on your property. The process is a little complicated, but nothing you can’t manage with the right guidance.
Good luck with your hand pump installation! Once it's completed, you can stop worrying about having access to your well water when you need it.
Need Professional Help?
Our certified installers can handle the complete setup with warranty coverage. With 25+ years of experience, we'll ensure you get a system perfectly matched to your needs.
Get Installation Quote - Professional consultation and system installation
Find Local Installer - Certified installation in your area
Ready to Get Started?
Installing a Simple Pump system is easier than you think. Request a free quote to get a custom system recommendation for your well, or contact our experts for personalized guidance.
Questions about installation? Call us at (877) 492-8711 or find a certified dealer near you for professional installation support.
Tags:
Ready to Get Started?
Get expert help choosing the right well pump system for your specific needs. Our team has 25+ years of experience in reliable water systems.